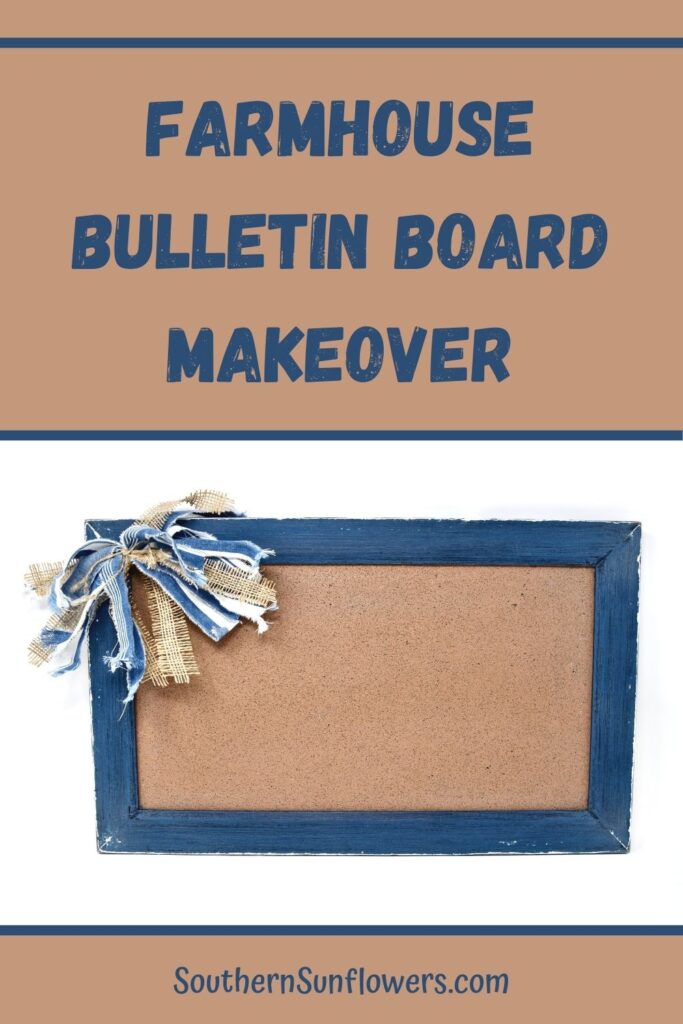
Are you wondering how to makeover a bulletin board for your home office or kitchen command center? Well, wonder no more because I’m sharing a great example for how you can makeover a brand new cork board or one from a thrift store.
I purchased my framed bulletin board from my favorite consignment store. It started at $5.98 and eventually moved to the bargain room where everything is priced $1.00. I love a bargain!
Get inspiration for a cork board makeover and follow my tutorial below.
As an Amazon associate, I earn from qualifying purchases at no additional cost to you.
HOW TO MAKEOVER A BULLETIN BOARD
SUPPLIES NEEDED:
- bulletin board
- acrylic craft paint
- foam brush
- artist paint brush
- painter’s tape
- fine grit sand paper
- chambray fabric strips
- burlap strips
- twine
- scissors
- seam ripper
- glue gun / glue stick
- E-6000 glue (optional)
- picture hardware (if needed)
- joint compound (if needed)
WHAT CAN BE USED TO COVER CORK BOARDS?
- CRAFT PAINT can be used to cover the cork surface like I used for my thrift store bulletin board makeover.
- FABRIC: Decorator or burlap fabric can be stapled to the cork portion and trim added to cover the perimeter of the fabric.
- SCRAPBOOK PAPER can be applied with Mod Podge. Brush glue onto the cork and then again on top of the paper.
- DECORATIVE DUCT TAPE comes in a variety of colors and themes.
HOW TO DECORATE A BULLETIN BOARD?
- MESSY BOW: For today’s makeover, I chose to make a messy bow for my decoration. Find instructions down in the post.
- FABRIC FLOWERS can be made using either cotton, denim, or burlap. Felt flowers can also be used like the ones I made for my door hanger craft idea.
- STENCILS are great for bulletin board decoration. There are so many stencil options available!
- FURNITURE BRADS can be used to help hold down fabric on the edges next to the bulletin frame.
- WALL STICKERS that I used on my memo board thrift store upcycle are available at Dollar Tree.

HOW TO MAKEOVER A CORK BOARD
STEP 1 – PREPARE THE FRAME FOR PAINTING
If needed, sand the frame and fill in any holes, nicks, or cracks with joint compound.
My board’s picture hardware located on the back side was off-centered, plus the sawtooth portion was too sharp for safety.
I removed the hardware and filled in the holes, and after the joint compound dried I sanded the area. The new hardware will be added later in the project.
Since the black frame portion felt slick like MDF, I used fine grit sandpaper to sand the frame. This creates a surface which paint will adhere to better.
STEP 2 – PAINT THE BULLETIN BOARD
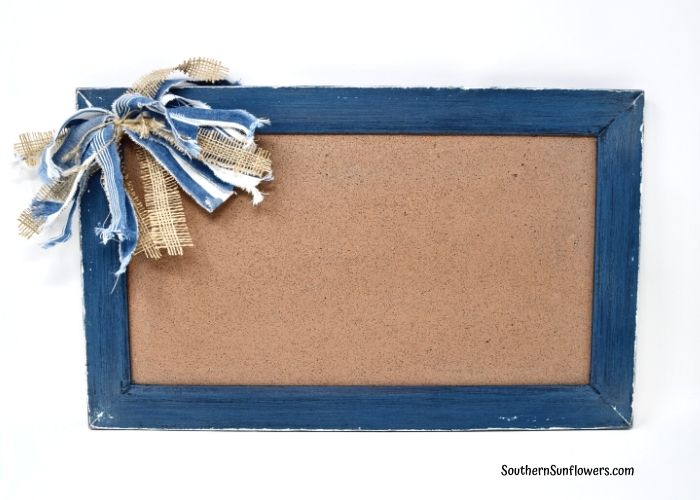
PAINT THE CORK: Since my board was used, I freshened the cork portion with 2 coats of brown paint using a foam brush. Let dry completely.
TAPE OFF THE CORK: Tear strips of painter’s tape and apply them to the cork portion (see picture below.) Make sure the strips are as close as possible to the frame inset to help prevent the blue paint from bleeding onto the cork.

STEP 3 – PAINT THE FRAME:
Use a foam brush to paint the frame’s back side and side edges navy blue. One coat is fine, since it won’t be seen after hanging. Let dry completely.
If frame is wide, like mine, haphazardly paint half the front and half the sides with ivory paint using an artist brush. Paint the whole frame if yours is a thin one.
I painted 3 coats of ivory, blending the edges, so there won’t be any hard, distinct paint marks. Let dry completely.
Use fine grit sand paper to distress the frame. Sand until the lighter shade peaks through and the navy paint turns a lighter blue, but also leaving some areas navy.

HOW TO DECORATE A BULLETIN BOARD
MAKE AND ADD A MESSY BOW
I chose to make a big messy bow made with chambray strips, burlap and twine.
Tear your fabric into strips. Figure the length of each strip according to how big you want your bow to be. I used 6 fabric strips, 3 burlap strips and 2 pieces of twine.

Since my fabric had been pre-washed, I only had to fray the opposite end. I used a seam ripper to begin fraying the ends and finished pulling the threads with my fingers.
WARNING: use extreme caution when using a seam ripper.
Layer the fabric strips into an X shape. Vary color and/or the textured layers. Pinch the middle together to see if your bow looks full enough. Adjust if needed.
Tie the middle tightly with twine a couple of times. Adjust strip placements to your liking.

Use E-6000 glue to attach the messy bow to the left corner. You could use hot glue, but I wanted to make sure the bow wasn’t going to pop off in the future.
Didn’t this bulletin board makeover turn out great? I hope it gives you the inspiration to update an old or thrifted board for yourself!
SEE MORE THRIFT STORE MAKEOVERS:
STEP STOOL MAKEOVER USING STENCIL AND STAIN

It’s once again time for “Do it Over” Designers! I’ve joined a group of designers who take something old and/or unused and ‘do it over’ into something new.
These items can be found in closets, barns, garages, yard sales, thrift stores, you name it. Below, you’ll find the links to view their makeovers. Don’t miss out!
CLICK THE LINKS BELOW TO SEE MORE “DO IT OVER” PROJECTS FROM MY FELLOW BLOGGERS!

SOUTHERN SUNFLOWERS (that’s me)
Sharing my bulletin board makeover at these fabulous blogs!

ABOUT THE AUTHOR
AllysonAllyson is the founder and content creator of Southern Sunflowers. She shares tutorials for DIY crafts and decor on a budget.
love the bow…bows really add to the look of items. I love the one you made as I am no bow maker
Judy, I surprised myself that the bow turned out good. I was right proud of myself LOL. I’m taking the bulletin board this week to a consignment store to see if it will sell as I have a vendor account there. Thanks for dropping by!
Great makeover Allyson. I have seen these in thrift stores too but never think about how to make them over. Thanks for the inspiration.
Thank you, Donna! Always happy to share some inspiration. 🙂
Now that plain bulletin board has some personality! Love the color and the pretty messy bow embellishment.
Thanks for the compliments, Marie! I was really happy with how my makeover turned out, too.
Very nice, love the color! Bulletin boards are always handy to have 🙂
Thanks, Tania! I’ve been trying to get more of that denim color worked into my decor.
Great makeover – clever idea to give it a new look!
Thank you, Patti! I’m glad you like my makeover. 🙂
That’s such a transformation! I love the messy bow addition, it really makes it something special.
Thanks, Julie! I’m normally not a good bow maker, but I surprised myself with this one turning out pretty good. Glad you approve of the bow!
Very cute! I love the messy bow.
Cindy, I’m so glad you like my board makeover and bow, thanks!
What a fun way to ‘do over’ a bulletin board, Allyson! And a great find, too! Thanks for the step by step instructions – it’s always great to have a special place to display important tasks and ideas!
Gail, I was all over that bulletin board find! I got a lot more deals on items that same day to makeover in the future.
I love the distressed look of your bulletin board, Allyson and the fabric/burlap you chose is perfect for it. Great makeover – and great price!
Thank you, Ann! I don’t normally do distressing, but gave it a go on a couple of projects lately. I really like how it turned out, too.
That rustic bow is so sweet! It’s the perfect touch to really take the design up a notch. Love it!
Kim, I’m so glad you like my bow and board makeover! I really like my bow addition, too, if I say so myself. LOL 🙂
Love how the cork board looks with your pretty bow Allyson; what a great way to tie in fabric!
Thank you, Sara! I’ve had that chambray fabric forever, so it was high time I used it for something.