Today, you’ll learn how to complete a simple framed art makeover. You will be amazed at how some paint, glue, and embellishments can totally transform a thrift store find!
While thrifting, I make sure I don’t miss looking at the frames and framed art section. I search for anything that’s unusual or the frame size looks interesting.
The framed art I chose to take a $2.00 chance on appears to be maybe from the 90’s. Wasn’t that when mauve was popular?
SIMPLE FRAMED ART MAKEOVER

I initially thought I’d paint the individual tiny flowers and greenery on the frame for a springy, colorful look when I purchased the frame a while ago. When I found my frame in my thrift store stash, I thought better of my time!
I totally changed my direction and chose to get closer towards a farmhouse look, hence, the barn red, denim blue, burlap and galvanized embellishment.

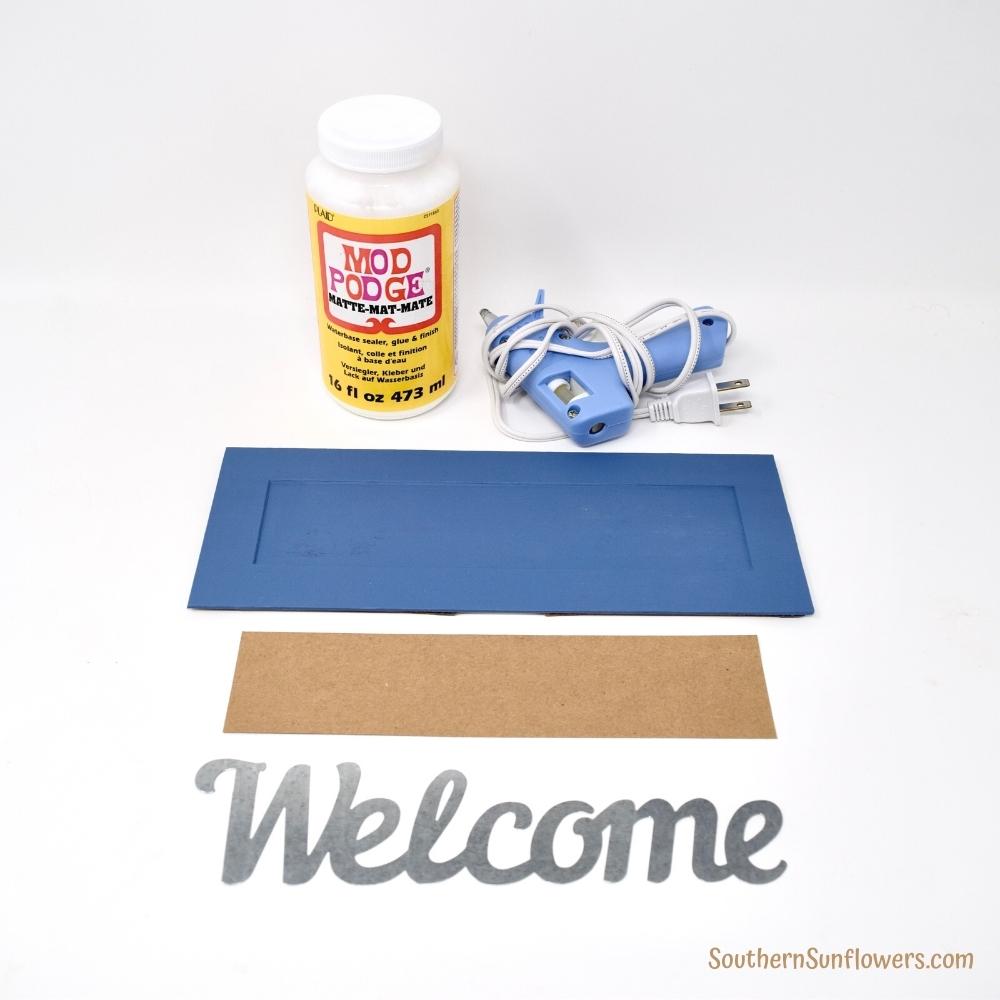
SUPPLIES NEEDED:
- thrifted framed art
- ‘Welcome’ ~ Dollar Tree
- craft paint
- Folk Art – Cardinal Red #2900CA
- denim blue
- scrapbook paper
- Mod Podge
- foam paint brush
- artist paint brush
- pencil
- ruler
- scissors or Fiskar trimmer
- glue gun or E-6000 glue
- twine

HOW TO UPDATE OLD FRAMED ART
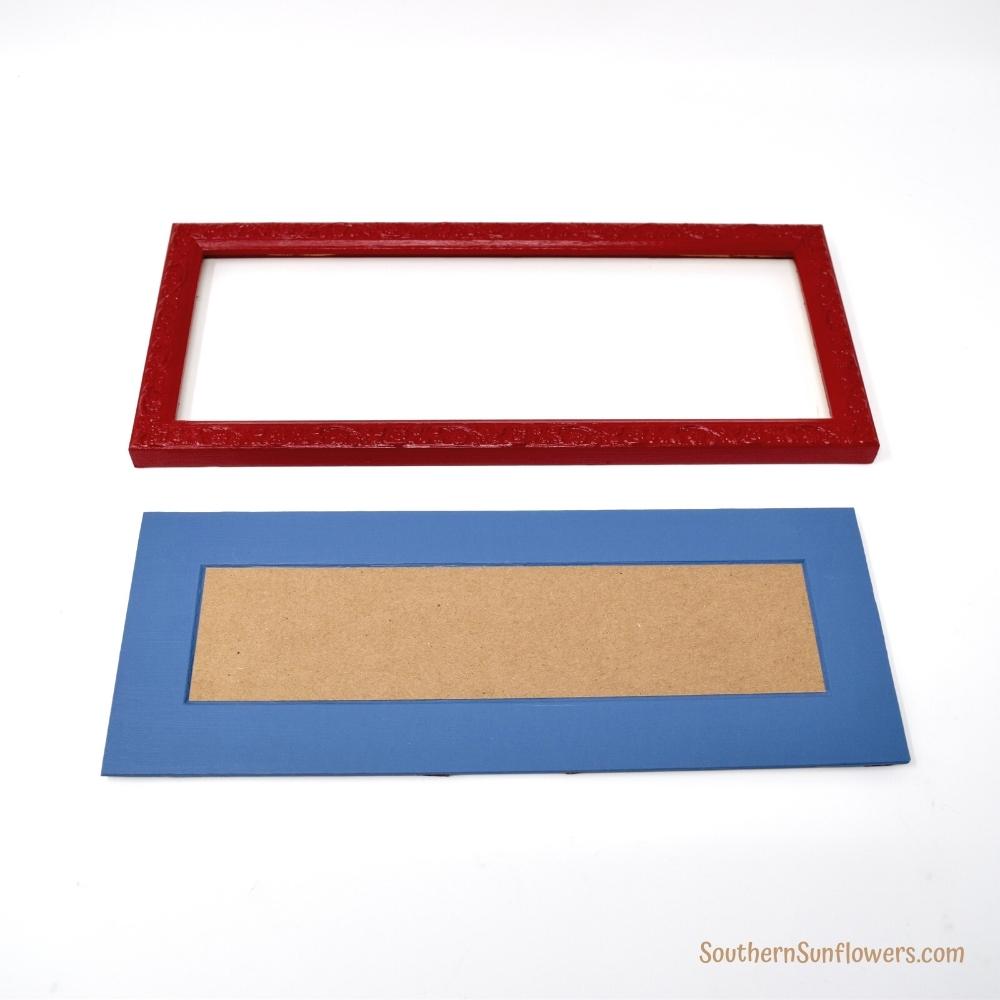
STEP 1 – DISMANTLE AND PREP FRAME
Take the framed art apart. The cardboard type backing on my frame had to be torn completely off and was going to be unusable. I’ll show you my replacement solution later.
Clean the frame. My frame is some kind of molded plastic, so all I had to do was wash it with warm water and soap.
If your frame is not wood, you will need to sand the smooth areas to roughen it up so the paint will take grip.

STEP 2 – PAINT THE FRAME
I used red Folk Art multi-surface paint which is thicker than regular craft paint. This kind of paint gives better coverage.
Paint the back and sides first using the foam brush. I used 2 coats on the back and 4 light coats on the sides. Let dry between coats.
I painted 4 coats on the front. For a textured design, such as mine, you’ll dab the foam brush up and down into the design and then smooth the top. Let dry between coats.
STEP 3 – PAINT THE PICTURE MAT
The art was attached to the mat, so I painted it also. I painted the mat portion with 3 coats of the denim color using a foam brush. Let dry between coats.
STEP 4 – PREP AND ATTACH THE EMBELLISHMENTS
My scrapbook paper feels a little thicker than the brown Kraft paper. Measure the inset of the picture mat and cut the paper to fit.
Apply Mod Podge on the picture portion and place the scrapbook paper down, press and smooth.
Use a glue gun to attach the galvanized ‘Welcome’ sign.
STEP 5 – CUT FRAME BACKING AND ATTACH
Since I was unable to use the original backing, I used a Dollar Tree sign for the frame backing and my hubby cut it to my measurements. See photo below.
You will need to sand the edges to smooth, and then paint the edges to match the frame.
Insert your new art into the frame.
Use a glue gun and/or E-6000 glue to attach the backing to your frame. I used both types of glue and stacked heavy books on top. E-6000 glue takes longer to dry.

STEP 6 – ATTACH HANGER TO FRAMED ART
Cut twine to your desired length and use hot glue to attach. I ended up using some red twisted twine instead of the regular twine which I included in the supply list picture. I purchased it during an after Christmas sale.
Yay, all done! Tell me what you think about my simple framed art makeover in the comment section below.


YOU MAY ALSO LIKE MY OTHER THRIFT STORE MAKEOVERS:
MEMO BOARD THRIFT STORE UPCYCLE
This month, I’m joining a group of designers who take something old or unused and ‘do it over’ into something new. There are 11 more makeovers and upcycles for you below. Click the links and don’t miss out!
CLICK THE LINKS BELOW TO SEE MORE MAKEOVERS AND UPCYCLES

The Apple Street Cottage ~ Ribbon Holder
Purple Hues & Me ~ Jute Vase with Flair Top
Exquisitely Unremarkable ~ Rice Paper Decoupage
Unique Creations by Anita ~ Restoration of Captain’s Chair
Pandora’s Box ~ Don’t Throw Away Old Ties
Birdz of a Feather ~ DIY China Cabinet Makeover
Little Vintage Cottage ~ Boho Wall Hanging Basket Arrangement
Modern on Monticello ~ DIY Mid-Century Modern Inspired Side Table
Sum of Their Stories ~ Spaghetti Jar to Garden Lantern Upcycle
Tea and Forget Me Nots ~ How to Repurpose a CD Rack
Southern Sunflowers ~ Simple Framed Art Makeover (that’s me)
Sharing my framed art makeover at these fabulous blogs!

ABOUT THE AUTHOR
AllysonAllyson is the founder and content creator of Southern Sunflowers, which shares tutorials for DIY crafts and decor on a budget.
Allyson,
I love this famed makeover. Congratulations, you are being featured on Thursday Favorite Things. https://www.eclecticredbarn.com I hope you stop by.
Hugs,
Bev
Thanks, Bev, I appreciate the feature!
Great upcycle project. I don’t always think of how to do a makeover like this when I see frames in a thrift store. Next time I will look harder at them for inspiration. Thanks for sharing it.
Donna, I can’t pass up the frame and wall art sections in thrift stores!
That is a lovely makeover! Pinned.
Thanks, Joanne! 🙂
Very pretty upcycle Allyson – you had me at red, my favorite color!
Thank you, Marie! Red is my favorite, too. I probably have too much of it in my home decor, but I can’t help myself ~ lol.
What a cute makeover, simple as you said but very effective.
Anita, I’m happy you like my framed art makeover!
What an update! Much more interesting than the original gold. Enjoyed our hop today!
Rachel, that mauve and gold 90’s look had to go!
Allyson, your frame turned out adorable. Love that you added a rope hanger. I didn’t know about the Folk Art paint and that it provided better coverage. Thank you for that tip. I will remember it!
Rachelle
Thanks for the compliment, Rachelle! The thicker Folk Art paint is the “Multi-Purpose” one.
This looks so nice now, great upcycle!!
Tania
Thank you, Tania! No one would ever guess it used to be mauve and gold.
This is a clever makeover – I always see uniquely shaped frames in the thrift store, so I will have to keep this idea in my mind!
Thanks, Patti! I can’t resist checking out the framing section in thrift stores. Keep your eye out for your next treasure!
What a fun way to spice of your home deco by remaking frame art! I love the new design!
Thanks, Gail! Glad you approve of my makeover.
I love repurposing framed ‘art’ to customize it! This turned out great Allyson!
Thank you, Sara!
Cute makeover, Allyson! I just picked up a frame with the same shape. It’s on my ‘To-Do’ list!
Ann, I’m happy you think my makeover is cute! Can’t wait to see how you use your frame.
Very pretty! Red is my all time favorite decorating color!
Thank you, Kim! I decorate with red, too. I love it so much that I probably use it too much.