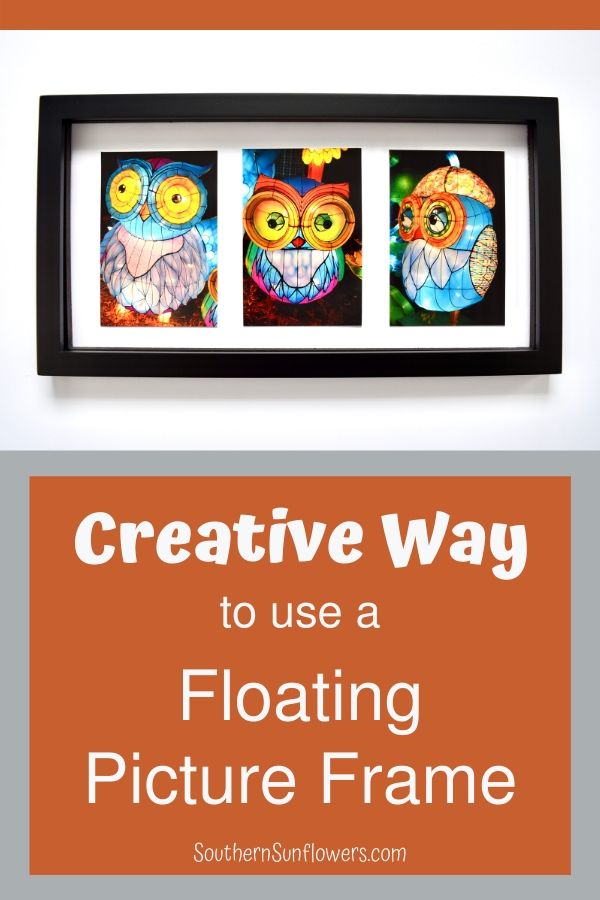
I came up with this floating picture frame idea when I received a set of owl photo cards that a friend gave to me.
The minute I saw these owl photo cards, I knew that I wanted to incorporate them into my craft room decor.
My craft room has bright turquoise walls and these pictures are a perfect match!

My idea was to make these unique photos into wall art.
I wanted to try a little something different than just a plain black frame so I purchased a float frame.
By using a floating frame, my turquoise wall would look like a mat for the frame.
This project only cost me $11.00! I purchased the black frame at JoAnn’s with a coupon. The frame is also sold in white.
My photographer friend took the owl photos at a Chinese lantern festival and used her photos to make note cards. She gave them to me as part of an “owl” themed gift.
FLOATING PICTURE FRAME IDEA
As an Amazon associate, I earn from qualifying purchases at no additional cost to you.
SUPPLIES NEEDED:
- photos
- float photo frame 8 X 16 ~ JoAnn’s
- paper cutter ~ Fiskars
- hammer
- screwdriver
- glass cleaner + paper towels
- adhesive remover ~ Goo Gone

STEP 1: DISMANTLE FRAME AND CLEAN GLASS
After removing the packaging, take a Phillips-head screwdriver and slightly loosen the moveable tabs on the back side of the frame.
Loosen the tabs just enough so you’ll be able to remove each piece of glass.
Carefully remove each piece of glass and remove the taped on pieces of paper, frame stand and hardware.
Dab a small amount of Goo Gone on top of the adhesive that is stuck to your glass.
I find that if the adhesive remover sits a bit that it’s easier to later remove the adhesive with just a paper towel. The results will be very greasy.
I cleaned my glass with glass cleaner about three times to make sure the glass was no longer greasy.
STEP 2: PREPARE THE PHOTOS FOR FRAMING
Use the paper cutter to cut around the photos on the cards. I highly recommend a paper cutter so you will get a perfect straight edge.
If you try to peel the photo off of the card you will bend the photo. Yes, I know this first hand – oops!
It’s actually better to keep the photo attached to the card because it will add stability to the photo.
It will also help in keeping the perfect placement on the glass when you add the second piece of glass.
STEP 3: HOW TO FRAME THE PICTURES
Sandwich your photos in between the two pieces of glass. I just eyeballed the placement of my photos, but use a ruler if you don’t trust your eyeballs!
TIP: Be sure the glass is completely dry before inserting the photos.

Place the last piece of glass and the frame inset back into the frame. Move the frame tabs enough to hold everything in place and then tighten the screws with your screwdriver.
Install the hanging hardware, or you can skip this step and just use the frame stand that is included with your frame.
I used my hammer to very lightly tap the screws into the pre-drilled holes just enough so they wouldn’t be wobbly or become angled while I screwed them into the frame. Finish inserting your screws with the screwdriver.
Now you’re all set to display your wall art!
Has this given you some inspiration for a different way you can frame your own special card or photo?
FOLLOW ME ON PINTEREST FOR LOTS OF HOME AND CRAFT INSPIRATION!

YOU MAY ALSO LIKE TO SEE:
HOW TO PAINT A PICTURE FRAME MAT

ABOUT THE AUTHOR
AllysonAllyson is the founder and content creator of Southern Sunflowers, which shares tutorials for DIY crafts and decor on a budget.


I love this idea, it looks great. And the owls are just the cutest.
Thank you, Anita! Glad you like the framed owls. Thanks for dropping in!
Love this of course! And I never knew goo gone could come in a spray bottle!!
The cards worked out perfectly in my frame and it looks great in my craft room. Thanks!