Today, I’m sharing with you how to paint a picture frame mat with bold stripes, and I’m also giving you access to a free winter printable ~ “Hello Winter!”
Have you ever gone to the framing department at your local craft store and not been able to find the right color mat for framing your picture or art, and custom matting is out of your budget?
Problem solved, because I’m going to show you how to paint your own mat.
Forget those plain and boring stock picture frame mats, and let’s paint one with some personality. Get ready for some bold stripes!
I’m also sharing with you a free winter printable that can be printed at home. You can frame the printable like I did using a white frame with the striped mat, or choose an idea of your own. You’ll find the download link near the end of this post.

HOW TO PAINT A PICTURE FRAME MAT
SUPPLIES NEEDED:
- plain white 8 X 10 mat
- silver metallic craft paint
- turquoise and dark blue craft paints
- sponge brush
- thin painter’s tape ~ Frog tape
- optional embellishments
- ruler and pencil
- 8 X 10 white frame
I used a mat that I already had on hand, which was not true white, so I had to paint my mat white. If you have to do this, wait for the white paint to dry completely before taping off for your stripes.

HOW TO PAINT A PICTURE FRAME MAT
STEP 1: MEASURE FOR STRIPES AND APPLY TAPE
- Use a ruler to measure out an equal distance where you want your wide stripes to be painted.
- With those measurements, mark with pencil on the end of each long edge of the mat where you will place your tape.
- Using your marks as a guide, start placing your tape.
As you can see in the picture below, my outer pieces of tape are about a 1/4 inch from the mat inset, and the other pieces of tape are spaced about one tape width in between each other.
I used wide Frog painter’s tape because that’s what I had on hand, but I recommend Frog thin tape. Thin tape will be a lot easier to work with.
The red arrows in the picture below indicate the sections where you will be painting the wide turquoise stripes.

STEP 2: PAINT WIDE TURQUOISE STRIPES
TIP: Make sure the tape edges are sealed well to prevent paint seeping underneath the tape. Mine didn’t turn out perfect, so I suggest lightly running your fingernail along the edges to seal the tape. You can touch up bleed through later.
- Load your foam brush with paint (not too soppy)
- Pounce the excess out a little bit
- Paint away from the taped edges so no paint seeps under the tape
- I loaded my brush a few times for each stripe
- After the outward painting is complete, paint the stripes lengthwise
- Continue painting each stripe
By the time I was done painting my last stripe, the first stripe was already dry enough for a second coat. After your second coat is dry on each stripe, paint a third coat.
Carefully remove the tape before the paint is totally dry.
STEP 3: TAPE OFF FOR THIN STRIPES
If you use the wide Frog tape then you’ll only be able to tape off for the first 4 thin stripes as I did in the photo below. Like I said earlier, using thin painter’s tape will make this easier.
Mark the thin stripes about 1/4 inch wide. I eyeballed the width I wanted my thin stripes to be, but use your ruler if needed.
In the photo below the red arrows indicate the sections where you will be painting the dark blue stripes. (The turquoise paint in the picture is just me reusing some tape).

STEP 4: PAINT DARK BLUE THIN STRIPES
- Don’t load your brush too heavy with paint for the thin stripes
- Paint 3 light coats of dark blue paint
- Slowly remove the tape before the paint is completely dry
You can touch up bleed through later.
TIP – Don’t use old paint. Ask me how I know! The dark blue old paint I used peeled up in some spots when I removed the tape, so I had to retape those areas and repaint.

If you are using the wide Frog tape, now is the time to tape off for the last 2 thin stripes and then paint. Make sure your first 4 are dry first.
STEP 5: TAPE OFF FOR METALLIC STRIPES AND PAINT
- Follow all the steps like you did for the other stripes and painting.
- After all stripes are painted, touch up bleeds with a small artist brush.
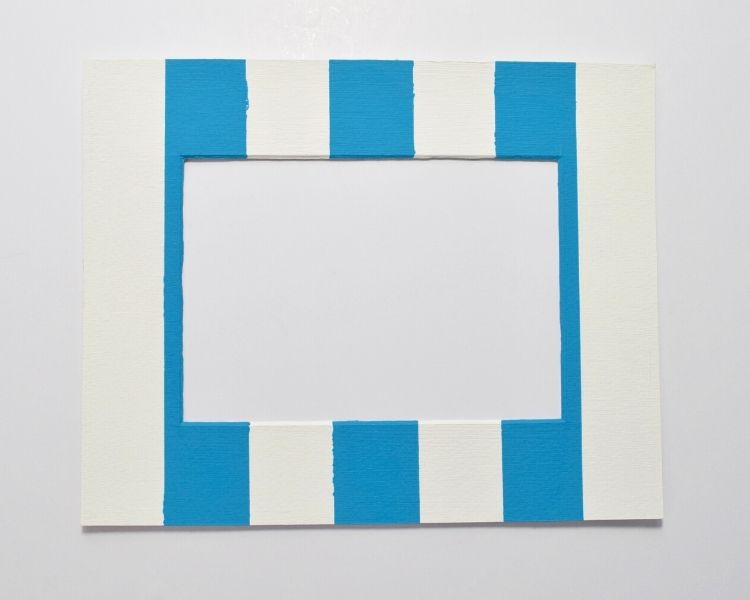
Two stripes remain white in the middle because I knew my white frame would act as two more white stripes. I love how the silver metallic paint shimmers on the mat.

STEP 6: GLUE ON EMBELLISHMENTS ~ OPTIONAL
I tried the snowflakes and they look real cute on the frame, but I opted for a plain frame.

DOWNLOAD “HELLO WINTER” PRINTABLE
- Print on good quality cardstock 110lb.
- The wording for the ‘Hello Winter’ free printable is grey to blend with the metallic paint on the frame mat.
- You will need to trim your paper down to 8 X 10 to fit the frame and mat. Just center the mat over the ‘Hello Winter’ words, trace around the outside of the mat with a pencil, then cut your lines with a paper cutter or scissors.
- Printable for personal use only.
Now you know how to paint a picture frame mat with stripes! What color stripes will you use to paint your picture frame mat?
YOU MAY ALSO LIKE TO SEE THIS PAINTED FRAME:
DIY PHOTO FRAME USING A CRAFT STENCIL


Sharing this painted frame mat at these fabulous blogs!

ABOUT THE AUTHOR
AllysonAllyson is the founder and content creator of Southern Sunflowers. She shares tutorials for DIY crafts and decor on a budget.
You didn’t say *how long* to let each coat of paint to dry.
KJ, Thank you for visiting. Acrylic craft paint dries quickly on picture mats because they are a paper product. 10 minutes should be enough time in between each coat of paint. If you’re still unsure if it feels completely dry to the touch, you can give it a quick burst of air using a hair dryer to ensure the coat of paint is dry. Happy crafting!
Allyson,
I love your winter sign. Congratulations, you are being featured on Thursday Favorite Things. I hope you stop by. https://www.eclecticredbarn.com/2020/01/thursday-favorite-things_23.html
Hugs,
Bev
Awesome!!! Thank you so much!!!
Very cute! I love the snowflakes!
Thank you, Jenna!
Such a cute idea and so versatile for any holiday/season. Pinning!
Yes, there are endless color possibilities for sure. Thanks for pinning!
You did a great job, well done!
Thank you, Anita!
Great tutorial and technique for painting perfect strips. Love the frame.
Thanks, Claire!
Remaking the mat is a great idea I had no thought of. It allows the center to be something plain as a focal point. Thanks for the inspiration I am going to try something similar maybe for Valentines even.
Yes, this project has endless possibilities for changing up the colors.
This is so pretty! I’m horrible at painting a straight line. Using the tape makes a world of difference! Thank you for the free printable!
Thank you! It was a lot of taping, but luckily craft paint dries very quickly or else it would have been a long project. 🙂
Allyson, what a neat project idea! I love the colors you chose for winter. I may have to try this using some old frames I have tucked away. Perhaps some of my coastal paint colors left over for a beachy vibe. Thanks for sharing.
Yes, beachy colors would be awesome to use. The color options are endless!