These DIY flower picture frames could not be any easier to make! They are super quick to put together and are very inexpensive to make.
The cheerful spring frames are also the perfect solution for a last minute gift that anyone would appreciate and admire!
Before we get into how to make the flower frames, it’s time for another monthly “Under 10 on the 10th” blog hop. I’ve joined with a group of creative bloggers to share our spring projects with you that cost less than $10 to make.
After my post, you’ll find the links to view their inexpensive home decor and craft ideas that you can create yourself. Be sure to visit each one!

DIY FLOWER PICTURE FRAMES
SUPPLIES NEEDED:
- acrylic frame
- scrapbook paper
- flower stickers
- scissors
- ruler
- pencil

DECORATING ACRYLIC PICTURE FRAMES WITH FLOWERS IS CHEAP
Update 2025 – Craft supplies may have increased since this post was written.
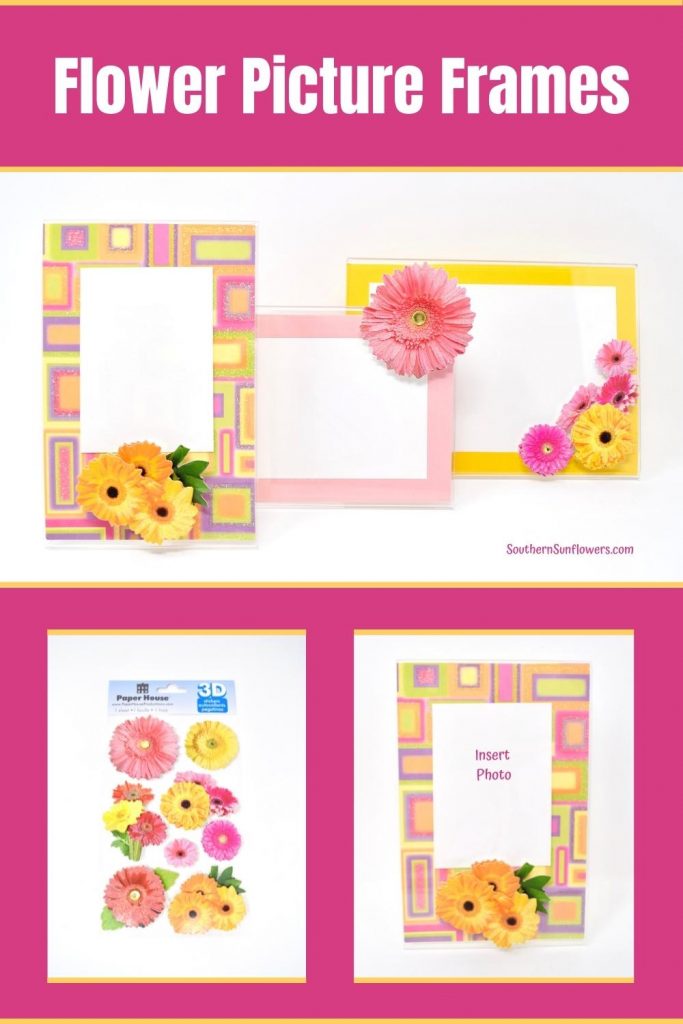
All of the acrylic picture frame ideas use the Gerber Daisy 3D stickers from Paper House. I’ve purchased lots from their website during their sale events.
Right now, the sale price for the Daisy stickers is $3.00 for a package of 8 flowers. I purchase up to the amount you can get free shipping during their promotions, so I can have items on hand for future craft projects.
The acrylic frames can be purchased from the Dollar Tree for $1.25 or Walmart. Scrapbooking paper cost less than 80 cents a sheet during sales at Michael’s. Paper House sells scrapbook paper, also.

HOW TO ADD SCRAPBOOK PAPER TO THE DIY FRAME
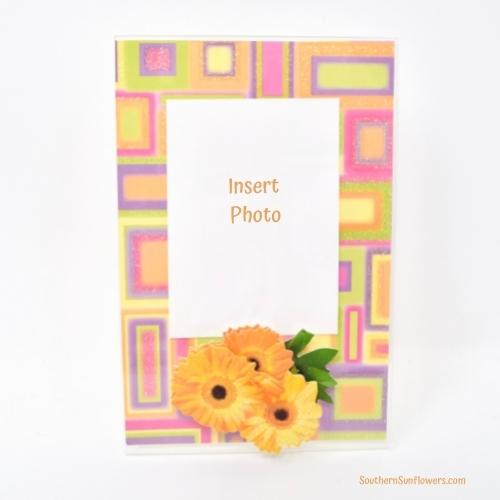
The decorative scrapbook paper will act as your frame mat for your photograph. I added the white paper just to give you an idea as to where you’ll place your photo.
Since the acrylic frame has some moveable give to it by slightly pulling it apart, you can easily insert the paper with your photo on top.
I suggest putting a bit of tape to the back of your photo to keep it in place as it’s inserted into the frame.
- Use the advertisement paper that comes in the frame as a template to mark on your scrapbook paper then cut it out.
- Choose a picture that you can cut down to 4×6 for a 5×7 frame, 3×5 for a 4×6 frame, and 2.5×3.5 for the upright 4×6 frame.
- Tape the picture to the scrapbook paper and carefully insert into frame.

HOW TO ATTACH FLOWERS TO THE PICTURE FRAME
The 3D stickers have a raised sticker on the back of each flower. Simply apply pressure to stick to your desired spots on each frame.
My pink daisy raised sticker was closer to one edge, so I was able to position it so that the flower went beyond the outside of the frame. I thought that placement gave it more creative personality.
I hope you enjoy making these simple DIY flower picture frames. Just think of the opportunities to change out the paper for other seasons and holidays!
SEE MORE OF MY PHOTO FRAME IDEAS
NUTS AND BOLTS FRAME FOR FATHER’S DAY
DIY BACK TO SCHOOL PHOTO FRAME

CLICK THE LINKS BELOW TO SEE MORE SPRING PROJECTS THAT COST LESS THAN $10 TO MAKE!

(Update 2025 – crafting supplies may have increased)
Tammy @ Patina and Paint ~ Easy Easter Wreath
Terri @ Decorate and More with Tip ~ Easy Wall Pocket Hanger DIY
Niki @ Life as a Leo Wife ~ DIY Easter Door Hanger
Allyson @ Southern Sunflowers ~ DIY Flower Picture Frames (that’s me)

ABOUT THE AUTHOR
AllysonAllyson is the founder and content creator of Southern Sunflowers. She shares tutorials for DIY crafts and decor on a budget.
I’m making these soon!
Great, Kristie! Glad I gave you the inspiration for making your own frames. 🙂
How cute and those stickers look amazing! Great idea, Allyson.
Thank you, Ann! The stickers look even cuter in person. 🙂
This is such a cute & creative idea! I love that you can customize the frame with your idea to match your home or the season. The 3-D flowers totally change the game. You could even use yours through summer as well. I can’t believe how easy it was! Happy hopping with you!
XOXO,
Niki
Thanks for the compliments, Niki! The 3-D daisy stickers are even cuter in person. I also bought some 3-D *sunflower* stickers (well, of course I did LOL) for a future project.
Allyson, theses turned out so cute! I have always wondered what I could do to dress those frames up. Now I know thanks to you!
Thank you, Corine! Those kind of acrylic frames don’t look so cheap after they’re all dressed up.
Allyson I just love these! I can see using different snap papers for almost any occasion in these. Plus, the colors you used are so fun and bright. These frames make me happy just looking at them. Thanks so much for sharing!
Thanks, Tammy. I’m so glad you like my frames even though they’re not “Easter” LOL!
Love your frames. You have inspired me to create frames to go with my home’s decor. Thanks so much for the inspiration Allyson!
Terri, I’m glad I could inspire you to make your own frames. They’re super quick and easy peasy to make!