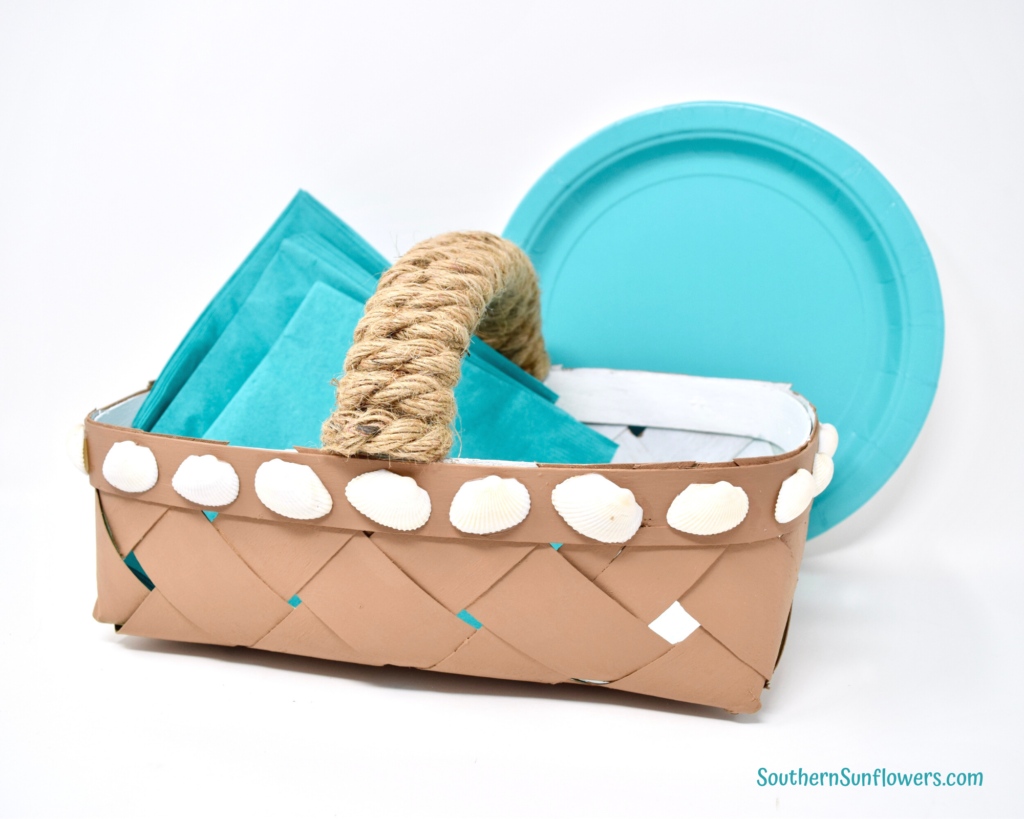
Are you a crafty beach lover? If so, you’re going to enjoy making this DIY seashell basket craft! It’s so easy and inexpensive to make, and a great way to use smaller shells you have collected at the beach.
Follow my tutorial to learn how to make this coastal basket craft and find out how you can use your basket.
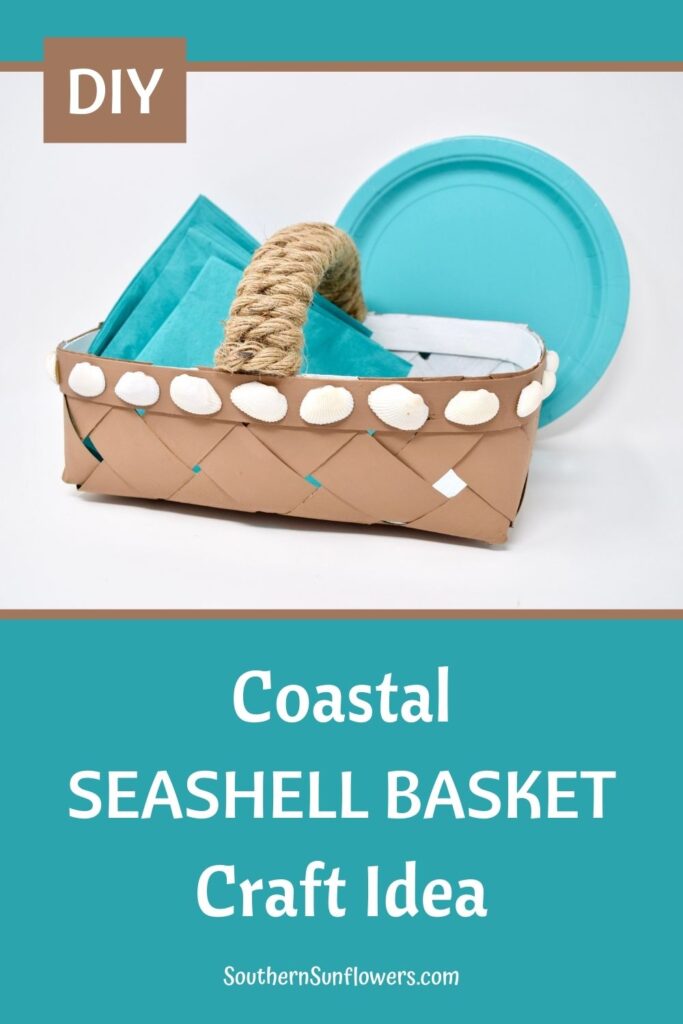
DIY SEASHELL BASKET CRAFT
WHAT CAN BE PLACED IN THE DECORATED SHELL BASKET?
- Party ~ place napkins and utensils in it for a cookout
- Home decor ~ use it for a couple of potted plants
- Bathroom ~ fill with washcloths for the counter
- Kitchen ~ fill with K-pods next to the coffee maker
- Beach trip ~ collecting shells on the beach
SUPPLIES NEEDED:
- chipwood basket ~ my $1.00 thrift store find
- Hobby Lobby sells them as a Diamond Weave Basket
- seashells
- nautical jute rope
- foam paint brush
- artist brush
- Tacky glue
- glue gun
- craft paint
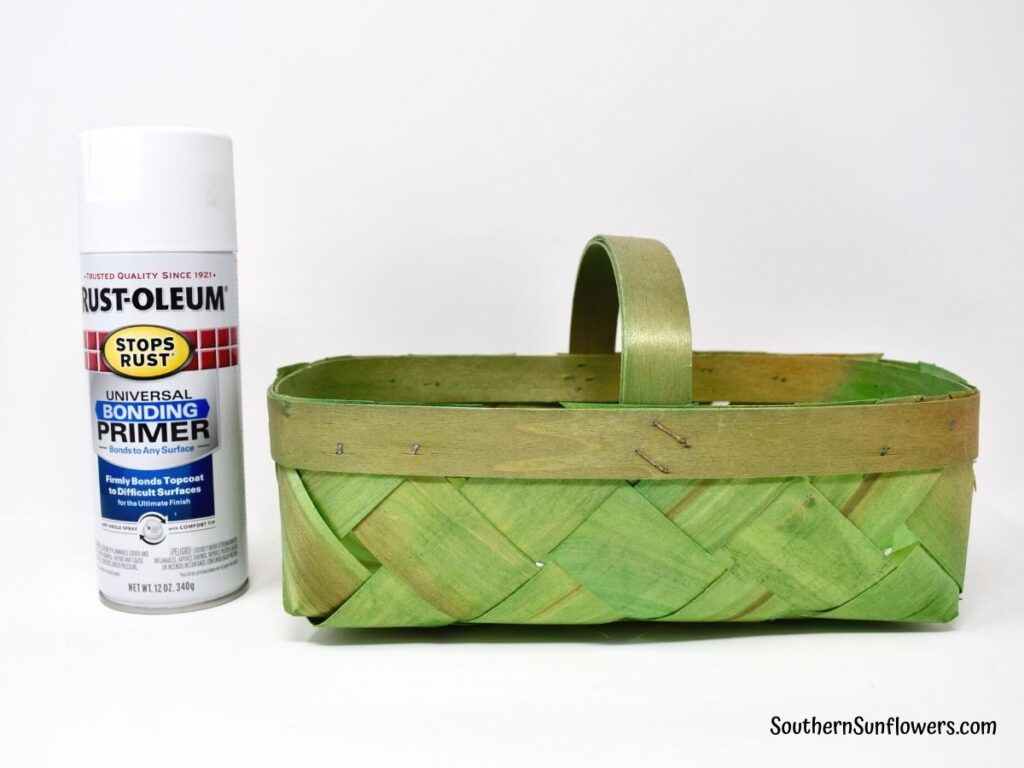
- white spray paint
- scissors
My design plan changed after I took the supply picture below, plus I just plain forgot to include some supplies (ugh), so the glue gun, tacky glue, artist brush, and scissors are not pictured. Also, the pencil is not needed.

HOW TO MAKE A SEASHELL BASKET CRAFT
STEP 1 – PAINT THE BASKET
Spray paint the basket with about 3 coats of white paint. It depends on what coverage you want on the inside. Let dry between coats.
Use a foam paint brush to paint the outside of the basket. I used 2 coats and afterwards touched up areas where needed. Let dry between coats
Use a small artist brush to get paint into the smaller areas that the foam brush can’t reach.
STEP 2 – WEAVE THE ROPE AROUND THE HANDLE
Follow the written instructions plus the visual guide (see picture below) to get a better understanding of how to weave the rope.
Keep in mind that you will be bringing the entire ball of rope in and out and over and under during the weaving process.
- begin by glueing the rope end to the back side of the handle where the basket joins the handle
- bring your rope up towards (1), covering the rope end, and then over to (2)
- put a dab of hot glue between (1) and (2)
- take the rope at (2) and pull under the back of handle to (3)
- pull the rope over the handle to (4)
- put a dab of hot glue between (3) and (4)
- and continue weaving the rest of the way on the handle
You should have the hang of weaving now.
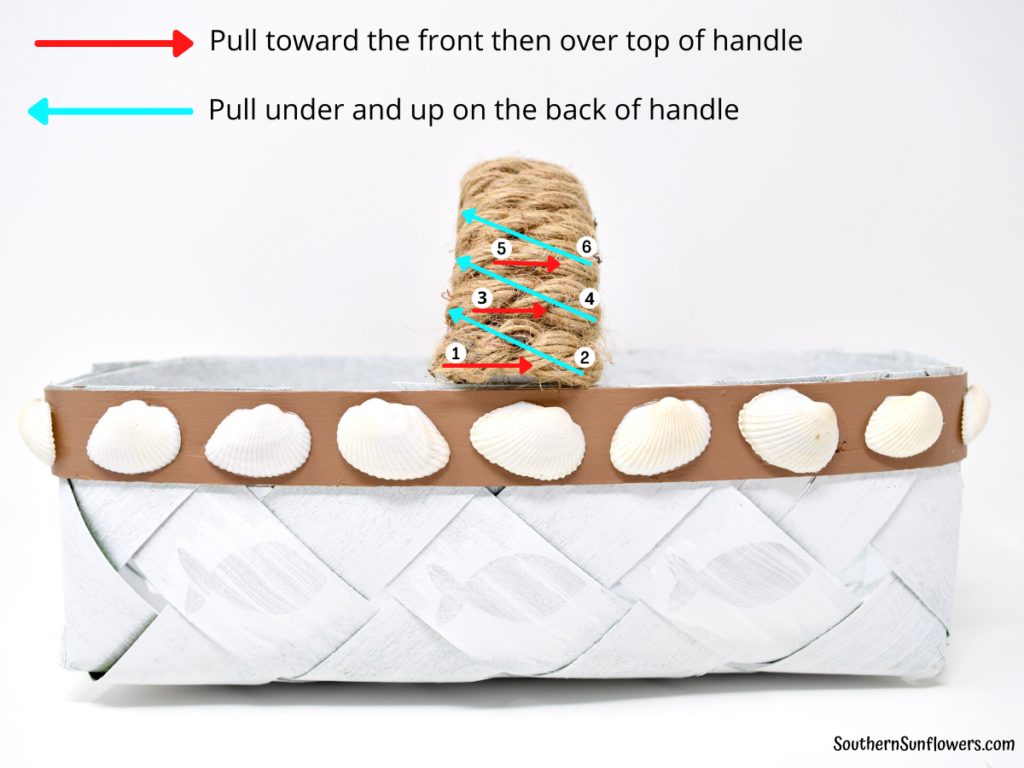
Weave to the other end of the handle. Cut the rope so that it ends underneath the handle.
Use a dab of hot glue to secure the rope underneath the handle, then mush Tacky glue all around the raveled ends and mush the ends together, let dry, then hot glue the end to the handle.
STEP 3 – GLUE THE SHELLS TO THE BASKET
Determine how many shells you can put on each side of the basket so they can be evenly spaced.
Using Tacky glue, squeeze enough out to just glue around the shell rim. Press the shells down on your desired spots.
Tacky glue dries clear, however, I still used q-tips to wipe away any excess glue by holding down the shell at the same time as wiping the glue away.
I waited for the glue on one long side to dry before moving on to the other side, so I wouldn’t accidently dislodge any shells before they were completely dry.

I hope you love my DIY seashell basket craft idea enough to make one for yourself! What will you fill your basket with?
YOU MIGHT ALSO LIKE TO SEE THIS DIY BEACH SHELL CRAFT:
DIY SHELL MIRROR FOR COASTAL DECOR
HOW TO PAINT A WOOD BEACH SIGN

It’s once again time for “Do It Over Designers,” which is a group of crafty bloggers who take something old and/or unused and make it over into something new. These items can be found in closets, garages, yard sales, thrift stores, you name it! At the end of my post, you’ll find 8 other crafty projects. Click their links so you don’t miss out!
SEE 7 MORE CRAFTY MAKEOVERS FROM THE “DO IT OVER” DESIGNERS:

Exquisitely Unremarkable ~ Super Easy Sock Snowman
Little Vintage Cottage ~ Repurposed Pasta Drying Rack
Modern on Monticello ~ DIY Mid Century Modern Door Mat
Purple Hues & Me ~ Decorative Cord Wrapped Holiday Tree
Southern Sunflowers ~ DIY Seashell Basket Craft (that’s me)
Unique Creations by Anita ~ Scrap Wood Mirror
The Apple Street Cottage ~ Vintage Table Clock Upcycle
Birdz of a Feather ~ DIY Decoupage on Wood
Sharing my seashell basket craft at the following fabulous blogs!

ABOUT THE AUTHOR
AllysonAllyson is the founder and content creator of Southern Sunflowers. She shares tutorials for DIY crafts and decor on a budget.
The “supplies needed’ photo is SO relatable! It’s hard isn’t it, when a craft project morphs as you go along. You don’t always know at the start where your idea will end up! This is lovely, a really versatile.
Julie, yes, my ‘supplies needed’ definitely turned out to be a hot mess for this seashell basket ~ lol
Cute upcycled chip wood basket for summer, Allyson!
I’m thrilled you like my summer basket, Marie! Thanks for stopping by for a visit. 🙂
Such an adorable basket. Great for a centerpiece for a beach picnic too. So glad you are part of the blog hop and shared your project.
I didn’t even think about creating a centerpiece with the basket ~ great idea! Yes, it’s fun creating and hopping with you and everyone else, too. 🙂
LOL Allyson, I always leave out at least two items needed for a craft supply picture. Your basket is perfect for a summer vignette or used to hold items. Lovely hopping with you.
RR
Lol, yes, my brain was complete mush when it came to the supplies I used! Very nice hopping with you, too!
This is a really cute idea, bet it is great for picnics on the beach. I love the colours too.
Yes, a beach picnic is a great idea. The good thing is that style basket can be purchased in larger sizes, also. Glad you like my shell basket!
I love your seashell basket!
Thank you, Tania!
I love how you designed your seashell basket, Allyson! It’s perfect for any summer, coastal and tropical decor! The woven handle looks very classy giving the basket a lovely focal point!
Thanks for the compliment, Gail! You just can’t beat that Dollar Tree rope for craft projects.
This is such an adorable basket, Allyson and I love the handle. I would fill mine with the shells I found at the beach!
Thanks, Ann, I’m so happy you like my shell basket! I’m going to have to use that Dollar Store rope for other projects in the future because I like how the handle looks, too.
Great project Allyson! I love how showed how you pivoted your project until you were happy with it! That’s exactly how it goes with crafting. Thanks for teaching me a new weaving technique; must pin to remember this.
Yes, I’m thankful I was able to make a change mid-project without problems. Glad you like my shell basket and thanks for pinning!
What a great idea!! I have several baskets and TONS of shells and I never know what to do with them. I walk at the beach almost every day and come home with them stuffed in my pockets or my {sandy} purse! I’m going to take your lead, make a shell basket and bring it with me so I have a place to collect them, transport them and keep them on display until I’m ready to use them!! Thanks!!
I’m glad I inspired you to make a shell basket for your beach walks! You’re so lucky you don’t have to buy shells like I do to make something.