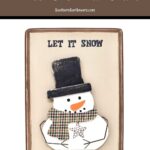
Are you ready to make your own winter decor? Of course you are! Let me show you how you can DIY a wooden snowman sign by simply using a Christmas ornament.
Snowflakes will be falling in my neck of the woods for the next couple of days, so what better time to get in the mood for making new decorations for winter.
Since I have tons of unfinished wood in my craft stash, I decided to make a sign to hang as wall art for my seasonal decor.
This snowman craft idea is budget-friendly since I used a pre-made wooden snowman ornament that I purchased 50% off for $1.50, and the 5 x 7 wood plaque will cost you about $3.00.
Follow along as I show you how to paint your wood sign and how you can alter a snowman to fit your colors and style. I went for a rustic, distressed look and added a “let it snow” saying.
DIY WOODEN SNOWMAN SIGN

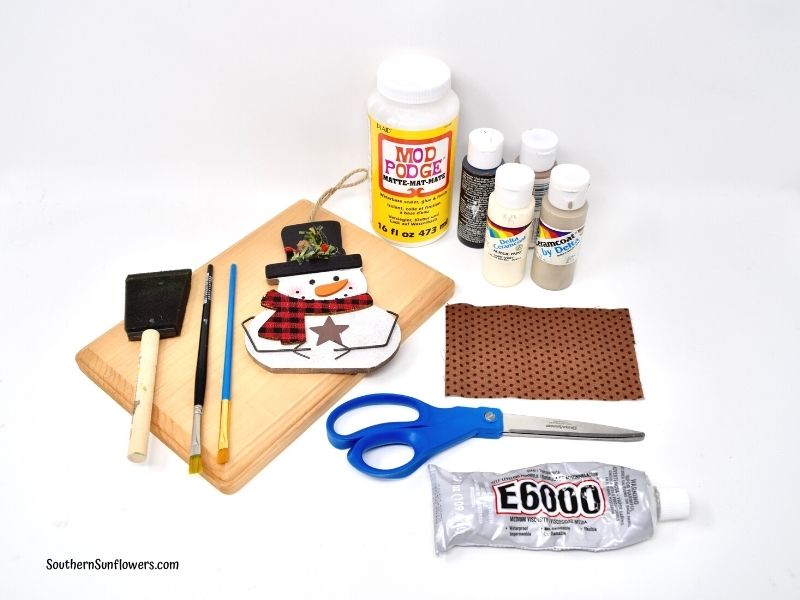
SUPPLIES NEEDED:
- wood plaque
- snowman ornament
- scrap fabric
- black craft paint
- shades of brown craft paint
- artist paint brushes
- sponge paint brush
- Mod Podge
- E-6000 glue
- sandpaper
- scissor
- pen
- sawtooth hanger (optional)
- hammer (optional)
HOW TO MAKE A DIY WOOD SNOWMAN SIGN
STEP 1: PAINT THE WOOD PLAQUE
- use foam brush to paint one coat on the back side, let dry
- paint one coat on back side bevel with black, let dry
- use brown shade to paint the remaining beveled edges, overlap a bit of brown on the front side, let dry
- use foam brush to paint one coat tan shade on the front side, let dry
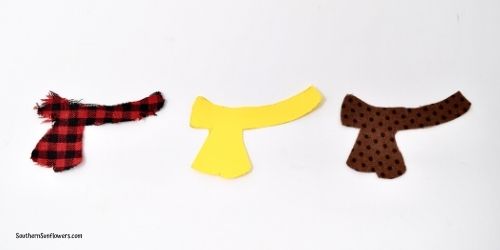
STEP 2: ALTER THE SNOWMAN ORNAMENT
See photos below to view what I changed on my ornament and how the scarf pattern sequence looks.
- use artist brush to paint the color changes
- I used scissors to pop off the embellishment and to scrape the existing glue off (use with caution if you use this method!)
- peel off fabric scarf, trace to make pattern, cut out new scarf, apply Mod Podge to ornament, press new scarf on

STEP 3: DISTRESS THE WOOD AND ATTACH WALL HANGER
- rub sandpaper to distress all painted edges of the plaque until you get your desired rustic effect
- if you want to hang your sign, attach a sawtooth hanger on the back using a hammer
STEP 4: ADD A SAYING, PERSONALIZATION, OR WELCOME
Use a cutting machine to add your words or use the “old school” method:
- print out your selected words and font made in Word
- cut out your saying
- use pencil to rub graphite completely over the back side of the words
- place saying in desired spot on sign, tape down
- use pencil to trace the letters and the design will be transferred
- paint the letter using an artist brush
I hope this snowman craft idea gives you the inspiration to make your own winter wood sign!
Follow me on Pinterest for more craft inspiration


YOU MAY ALSO BE INTERESTED IN:
8 CRAFTY WAYS TO DECORATE YOUR HOME FOR WINTER
I’m participating in a monthly blogging challenge with a few of my fellow craft bloggers! The challenge each month is themed and all projects must be inspired by a pin on one of our pinterest boards and also have some sort of a sustainable element to them.
This could be an upcycling or recycling element, or something that reduces waste, uses leftovers etc..Our theme this month is “Shopping our Stash,” so I dived into my overflowing wood stash to make my sign that’s loosely based on this rustic snowman. Be sure to check out my fellow blogger’s crafts below. Don’t miss out!
VIEW MORE BLOGGER CRAFT PROJECTS BELOW!

ABOUT THE AUTHOR
AllysonAllyson is the founder and content creator of Southern Sunflowers. She shares tutorials for DIY crafts and decor on a budget.

Your snowman is cute!
I’m so happy you think my snowman is cute. Thanks, Julie! 🙂
So cute! I love how you made him over, especially the scarf. I’ll have to keep an eye open for similar opportunities.
Thanks, Lydia! I purchased the snowman during the after Christmas sales. It’s a great time to think ahead for future projects.
This is so cute! I love the snowman’s scarf!
Thanks T’onna! That scarf took him from his Christmas look to his Winter vibe. 🙂
I love how you used a snowman ornament for the feature! Very very clever.
Thanks, Terri! I’m glad you like my snowman craft.
Great project, Allyson. I love how you altered the snowman to change him from a Christmas snowman to a Winter one. Very clever!
Thank you, Ann! Sometimes I have a good idea or two – LOL 🙂
What an awesome idea to make a wooden snowman sign – especially right now – with snow and frigid temperatures in most areas! It’s certainly a fun winter project both adults and kids would enjoy!
Yes, I definitely have winter on my mind with our Maryland weather. Glad you like my snowman project!
He is so cute, I love his makeover, or is it a makeunder and he is a little bit classier now? It’s such a good idea to make Christmas ornaments work for a longer period of time, the Christmas holidays are pretty short so extending their life is a lovely thing!
Thank you, Julie! I’m so happy you like how I made over my snowman. I bought a few other ornaments to change up in the future, too.