Learn how to decoupage and paint a thrift store plate. It’s quick, easy and budget-friendly. A home decor craft can’t get any better than that!
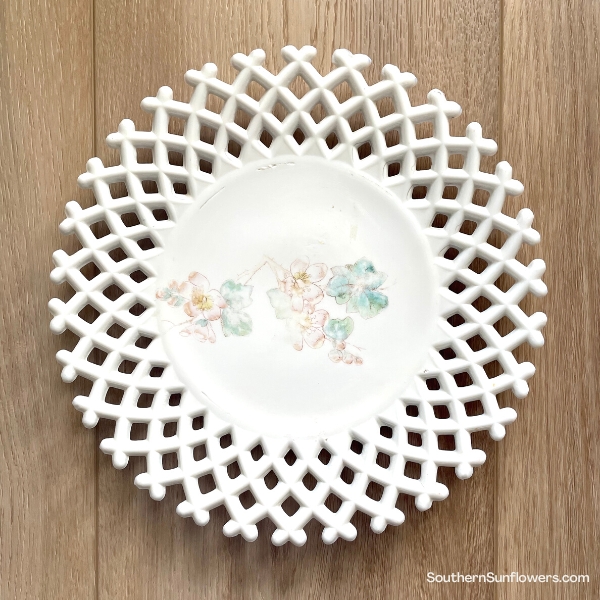
I came across my white decorative plate at a thrift store a few months back. It was sort of looking like a milk glass wanna’ be, and the faded, off-centered design was looking very sad.
Despite the negatives, I loved the decorative edging and with my usual thrift store reasoning, I thought “this has potential!”
Valentine’s Day kept coming to mind each time I looked at the plate sitting on my thrift store storage shelf. I think the tip tops on the plate edging look like little valentine hearts.

HOW TO DECOUPAGE AND PAINT A THRIFT STORE PLATE
When it came time to makeover my thrift store plate, my thoughts were…
How am I going to distract from the plastic looking molded edges, fill in the cracks, and hide the stains that refused to budge?
Printable art and chalk paint came to the rescue for my plate makeover!
Painting with chalk paint provides good coverage, so it worked wonderfully covering up all the plate defects.
I made a Valentine’s Day free printable to cover up the faded design. If you’re interested, you’ll find the free download in this post.
As an Amazon associate, I may earn on qualifying purchases at no additional costs to you.
SUPPLIES NEEDED:
- thrift store plate
- chalk paint
- Mod Podge
- paint brush
- baker’s twine
- 110 lb cardstock
- laser printer
- scissors

PREP THE THRIFT STORE PLATE
I washed my plate with soap and water and then wiped down with Windex. You can also use alcohol to wipe the plate.
CAN CHALK PAINT BE USED ON PLATES?
Yes, it sticks well to slick surfaces and provides excellent coverage.
Paint very light coats when using chalk paint on ceramics, porcelain, and glass.
HOW TO PAINT A THRIFT STORE PLATE
PAINTING THE DECORATIVE PLATE
I used a foam paint brush to paint my plate with very light coats of white chalk paint. The foam brush worked well for getting into the nooks and crannies.
My plate needed 2 light coats to disguise the cracks and stains.
To speed up drying time in between coats use a hair dryer on low heat.
I brushed on some Mod Podge over the dried paint to protect it from potential scratches.

PREPARING THE PRINTABLE DESIGN
If you choose to use the design provided for a thrift store upcycle, keep in mind that a home printer will produce much softer colors, likely looking more pink.
I had Staples use their laser printer which produced a crisp look and true pink and red colors.
The round design was made to fit the inset of my plate ~ 6.25 inches. However, the print will be on an 8.5 x 11 sheet of paper with no cutting border, so see if it will work for one of your makeovers!
I highly recommend printing on 110 lb. cardstock for best results.
“LOVE YOU MORE” FREE PRINTABLE ~ DOWNLOAD

HOW TO DECOUPAGE A PLATE
Mod Podge is the glue used to decoupage. I didn’t have any problems with using Mod Podge over the chalk paint.
Use an artist or foam brush to paint an even coat of Mod Podge on the area where the paper design will be placed.
Place the design on top of the Mod Podge. Begin pressing at the center and lightly pressing and smoothing outwards with your fingers until it has completed adhered.
ADD BAKER’S TWINE FOR THE TRIM
You’re going to be adding the baker’s twine trim where the paper edge and plate meet. You don’t want to see the paper edge.
Apply a very small amount of Mod Podge to the tip edge of the sponge paint brush.
You want the glue line not to be wider than the width of the twine, but if it does, the glue dries clear.
Dab Mod Podge on in about 2-inch sections at a time where the paper edge and plate meet.
Start placing the twine, lightly pressing it into the glue. The two twine ends will need to be slightly overlapped and glued down.

Hopefully, my decoupaged and painted thrift store plate inspired you to look twice while thrift shopping. Look for that diamond in the rough!


SEE MORE OF MY THRIFT STORE MAKEOVERS:
STEP STOOL MAKEOVER USING STENCIL AND STAIN
I’ve joined a group of designers this month to share our upcycles and makeovers with all of our readers. We take something old and/or unused and ‘do it over’ into something new. Our items can be found in closets, barns, garages, yard sales, thrift stores, you name it!
Be sure to click their project links below to see what they’re sharing. Don’t miss out!
Meet your “Do-it-Over Designers” below and click their links to see what they’ve created!

Sharing my thrift store makeover at these fabulous blogs!

ABOUT THE AUTHOR
AllysonAllyson is the founder and content creator of Southern Sunflowers. She shares tutorials for DIY crafts and decor on a budget.
Allyson,
What a great project!! I love it!! Thanks so much for sharing and thanks for taking the time to visit!!
Hugs,
Deb
Debbie, so glad you like my thrift store makeover!
How pretty Allyson! I happen to have a similar plate stuffed in a drawer that never sees the light of day. Time to play with some Mod Podge *wink* *wink*
Thank you for the compliment, Marie! Love me some Mod Podge ~ lol.
This plate turned out so wonderfully! It is a star attraction now! Smiles, Linda at Paper Seedlings
Linda, thanks for dropping in! That plate was looking so sad and I think it stands out now, too.
Allyson, the plate is beautiful and perfect for Valentine’s. Thank you for sharing your DIY!
Pam, thanks for the compliment on my thrift plate makeover and for dropping by!
That’s pretty – I have only ever decopaged clear plates with fabric behind them. And thank you for the reminder to put my Valentine’s decor out! Have a good week (:
Gina, believe it or not, I still haven’t tried the clear plates with fabric, but I want to try that out. I remember that style from at least the 90’s and have always like the way they look. Thanks for visiting!
Love this upgrade, that’s what upcycling is all about! Good idea to get it printed nicely at Staples too.
Thank you, Rachel! Printables always look so much better from a laser printer. My test print at home was faded pink hearts ~lol.
Your plate turned out so pretty and the design is perfect for valentines day.
Anita, I’m so happy you like my plate ~ thanks!
Well that is a transformation if ever I saw one! You really did see potential in this plate that most of us would have overlooked!
Julie, I couldn’t resist the plate’s decorative edging and I was determined to figure out how to give it a new look!
Aww, that’s so cute! I love it!
Tania
Tania, thanks for the compliments on my plate!
Your finished piece is quite lovely, Allyson! What a transformation! Decoupage can certainly work wonders on pieces! Love the new look! Perfect for Valentines!
So glad you like my makeover, Gail! I love decoupage and the fact that it covers a multitude of defects on thrifted items.
I love how you updated this pretty plate that was a little tired from age. It’s so pretty now…and just in time for Valentine’s Day!
Thank you, Ann! I don’t have lots of Valentine’s Day decor, so it’s nice having something new to display.
Gorgeous transformation! I couldn’t figure out how you got that amazing candy striping until I got to the part about the bakers twine. It finishes it off so nicely!
Thank you, Sara! I got lucky on the baker’s twine idea since I had no clue prior to what would even work. Luckily, it was in my stash!
Thanks for the download, I’m totally going to make this one!! I’m a thrift store junkie and a dish lover, so I have a big collection just waiting for a unique makeover. Great idea!!
Kim, I can’t wait to see your upcoming plate makeovers. Happy thrifting!